If your air conditioner isn’t turning on after winter, there are typically five key areas to check before calling a professional. These include power supply issues, thermostat settings, tripped circuit breakers, clogged filters, and issues with the outdoor unit’s disconnect switch. Addressing these common problems can often resolve the issue quickly and save you a service call.
Check Your Power Supply and Thermostat Settings
The first and most straightforward checks involve your AC’s power supply and thermostat. Ensure your thermostat is set to ‘Cool’ and the temperature is set several degrees below the current room temperature. A common oversight is having the thermostat in ‘Off’ or ‘Fan Only’ mode. Also, verify that the thermostat has fresh batteries, as a dead battery can prevent it from communicating with the AC unit. For the power supply, locate your outdoor unit’s disconnect switch, usually a small box near the condenser, and ensure it’s in the ‘On’ position. Sometimes, it gets accidentally switched off during winterization or yard work.
Inspect Your Circuit Breaker and Air Filter
A tripped circuit breaker is a frequent culprit when an AC unit fails to start. Head to your home’s electrical panel and look for any breakers that are in the ‘tripped’ position (usually halfway between ‘On’ and ‘Off’). Flip it completely to ‘Off’ and then back to ‘On’. If it trips again immediately, there’s a more serious electrical issue that requires professional attention. Additionally, a severely clogged air filter can restrict airflow, causing the unit to overheat and shut down as a safety measure. Replace your air filter if it’s dirty, as this is a simple maintenance task that can prevent many operational problems.
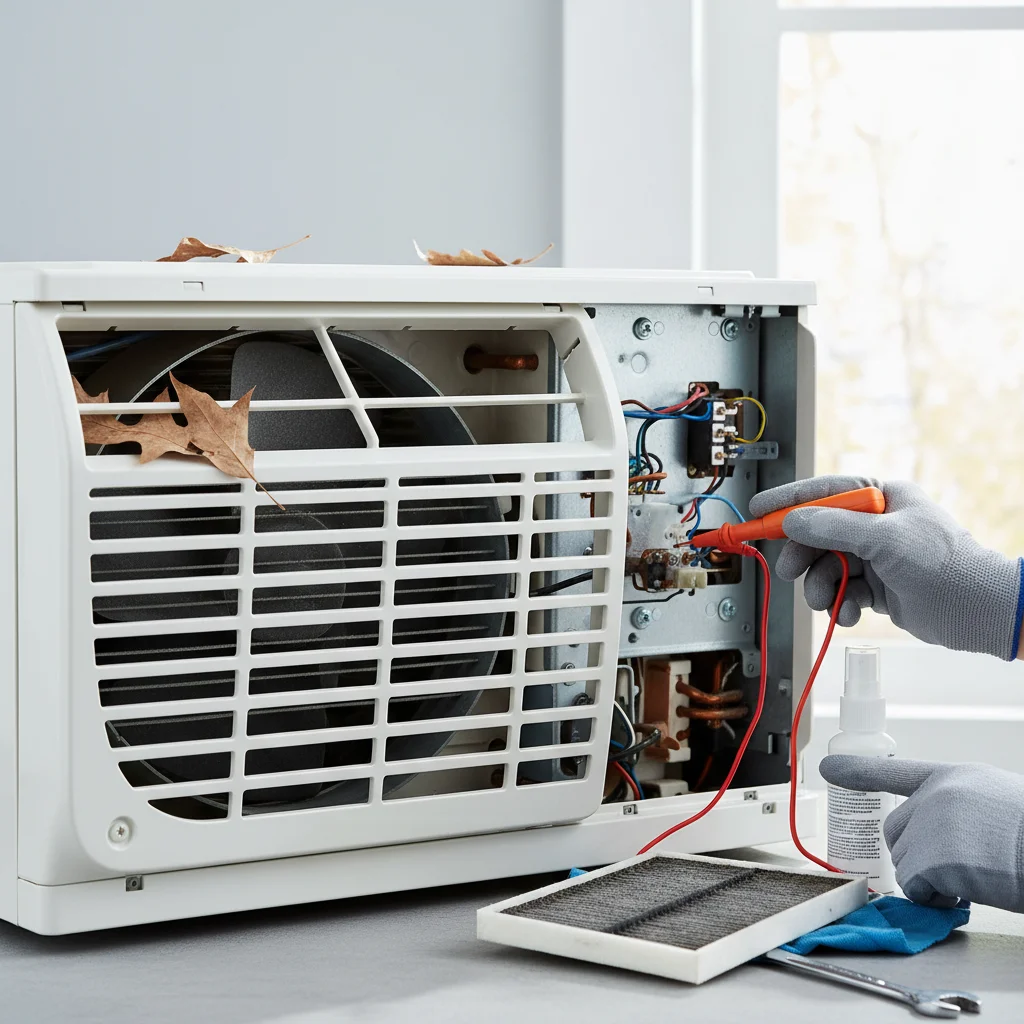
Examine the Outdoor Unit and Drain Line
|
Our Picks for the Best Air Conditioner in 2026
As an Amazon Associate I earn from qualifying purchases.
|
||
| Num | Product | Action |
|---|---|---|
| 1 | Portable Air Conditioners, 3-IN-1 Swamp Cooler, Evaporative Air Cooler,Remote & Touch Control, 90°+90° Oscillation,LED Screen, Air Coolong Fan for Outdoor Indoor |

|
| 2 | 24" Windowless Portable Air Conditioner, 15H Timer & 120°Oscillation, 3-IN-1 Portable AC Unit with Remote, 2-Gal Tank, 3 Modes & 3 Speeds, Ultra-Quiet Ventless Swamp Cooler for Home Office, Off |
|
| 3 | Evaporative Air Cooler with Remote & Timer, 2200+ CFM Portable Fan That Blows Cold Air for Large Room, Home Office, Bedroom - 2.1Gal High-Capacity Tank, 3 Modes, Whisper Quiet 30dB & Sleep Mode |
|
| 4 | Dreo Tower Fan for Bedroom, 42 Inch 120° Oscillating Fan, 25dB Quiet DC Motor, 28ft/s Velocity Bladeless Standing Fan with 12 Speeds, 4 Modes, 12H Timer Cooling Fans for Home, Living Room |
|
| 5 | Midea 5,000 BTU EasyCool Small Window Air Conditioner - Cool up to 150 Sq. Ft. with Easy-to-Use Mechanical Controls and Reusable Filter, Perfect for Small Bedroom, Living Room, Home Office |
|
| 6 | BLACK+DECKER Window Air Conditioner 10000 BTU, AC Window Unit Cools Up to 450 Square Feet, Window AC Unit with Remote Control, 3 Cooling Speeds and Fan Only Function, BD10WT6, White |
|
| 7 | Windowless Portable Air Conditioners with Remote, Ventless Ac Unit Ductless Air Cooler,Hoseless Quiet Evaporative Oscillating Swamp Cooler,12H Timer & 4 Ice Box for Room Indoor Outdoor Office Bedroom |
|
| 8 | Dreo Tower Fan for Bedroom, 2026 Upgraded DC Motor, 28ft/s High Velocity, 20dB Ultra Quiet Standing Fan, 8 Speeds 4 Modes, 90° Oscillating Bladeless Fan for Indoors, Floor Fans with Remote, Black |
|
| 9 | Windowless Portable Air Conditioner, 24.4" Small Evaporative Air Cooler for Room No Window, 3-Speed Settings, 4 Modes, 7H Timer, Remote Control, 4 Ice Packs, Quiet AC Unit for Bedroom, White |
|
| 10 | SereneLife Portable Swamp Cooler Air Conditioner - 2500 CFM Airflow, 8 Gallon Water Tank Portable Evaporative Air Cooler for Room & Outdoors, WiFi, Humidifier & Fan Modes, Ice Packs & Remote Included |
|
The outdoor condenser unit can accumulate debris over the winter months. Check for leaves, twigs, or other obstructions around the unit that might be blocking airflow or interfering with the fan blades. Gently clear away any debris. Also, inspect the condensate drain line for clogs. This line removes moisture from your home, and if it’s blocked, a safety switch can prevent the unit from operating to prevent water damage. You might see standing water around the indoor unit or a drip pan if this is the case. A simple solution can sometimes be to clear the clog with a wet/dry vacuum.
Consider the Contactor and Refrigerant Levels
If the outdoor unit hums but the fan doesn’t spin, or if there’s no activity at all, the contactor might be faulty. The contactor is an electrical switch that sends power to the compressor and fan. While this is a more advanced check, a visual inspection might reveal burnt or pitted contacts. Low refrigerant levels can also prevent an AC from starting or cooling effectively, as the system has safety mechanisms to prevent damage when refrigerant is too low. However, checking refrigerant levels requires specialized tools and should be done by a certified HVAC technician.
When to Call a Professional
If you’ve gone through all these checks and your air conditioner still isn’t turning on, it’s time to call a qualified HVAC technician. Issues like a faulty capacitor, a broken compressor, or complex electrical problems are best left to professionals. Attempting to fix these yourself can be dangerous and may void your warranty. A technician can accurately diagnose the problem and perform the necessary repairs safely and efficiently. Regular maintenance can prevent many of these issues from occurring in the first place, so consider scheduling an annual tune-up before the cooling season begins.
- Ensure thermostat is set to ‘Cool’ and below room temperature.
- Check and reset any tripped circuit breakers at your electrical panel.
- Clear any debris from around the outdoor condenser unit.
- Replace dirty air filters to ensure proper airflow.
- Verify the outdoor disconnect switch is in the ‘On’ position.
Get our weekly buyer guide
Practical specs, not advice. Unsubscribe anytime.